Buttons not working? Storage full? No Home button? Ever tried to take a screenshot on your iPad only to miss the buttons, trigger Siri, or lock the screen instead? This is quite a typical situation that users have to face while taking screenshots. Whether your iPad has a Home button, uses Face ID, or you are rocking a keyboard case, Apple’s shortcuts can feel like a mystery.
What you need is a clear, frustration-free way to capture your screen, no matter what the purpose. Hence, this guide will reveal the 5 easy methods on how to screenshots on iPad, including Apple’s lesser-known trick so that you can snap your screen like a pro.
Take a screenshot on iPad
Tap-to-Capture with Assistive Touch
Swipe & Snap with Apple Pencil
Keyboard Shortcut (For Magic/Bluetooth Keyboards)
The Classic Side Button Combo
If you want to know what is the newest iPad screenshot method, this is the one that most users try first, and for good reasons. The Classic Combo button lets you take a screenshot instantly using the physical button on your iPad. It is the fastest and most reliable way and doesn’t require any setup. For your better assistance, the following section will cover the detailed steps to capture your screen with ease:
Step 1. Open the target interface to capture and push the “Power” button and the “Volume” button at the same time.

Step 2. Next, press the mini screenshot window on the left side of the screen, in case you want to edit, then hit the “Done” button.

Step 3. Upon doing so, a drop-down screen will appear where you click the “Save to Photos” button to keep the edited screenshot in your gallery.

Using a Home Button
For those who have an iPad with a physical Home Button, you are in luck. This method is used on several older and free current iPad models, including the 5th to 9th generation, iPad mini-4, 5, and the iPad Air (1st to 3rd gen). If the previous method of iPad screenshot not working, follow this guide, which works by pressing the top power and home buttons at the same time:
Instructions. Shove the “Power and Home” button for a while after you navigate to the screen you want to capture.

Tap-to-Capture with Assistive Touch
To learn how to screenshot on an iPad without a home button, you can use this accessibility feature. It is designed to help users control their iPad without relying on physical buttons, and it can take screenshots too. One enabled, a floating on-screen button gives you quick access to device functions, including a one-tap screenshot option. Here is how you can do this by following the given tutorial:
Step 1. Access your “Settings” app and scroll down to choose the “Accessibility” option to set up this method. From the next screen, click the “Touch” option under the “Physical and Motor” section.

Step 2. Afterwards, press the “Assistive Touch” option and toggle it from the following screen. Under that, choose the “Customize Top Level Menu” option, which will take you to the Assistive Touch quick functions.

Step 3. Once you access that screen, hit the “+” icon, which will add another “+” icon under the “Tap An Icon To Change” section.

Step 4. Press the “+” icon once again and pick the “Screenshot” option from the given features to press the “Done” button in the top right corner.

Step 6. Now, open the target screen and tap the “Assistive Touch” icon to choose the “Screenshot” icon from the pop-up menu, and you are done.

Swipe & Snap with Apple Pencil
Another method to take a screenshot is by using the Apple Pencil, which lets you do with a simple swipe without any button or menu. This gesture-based method works by swiping up from the bottom corner of the screen, which instantly triggers the screenshot and opens it up in Makeup Mode. It is a seamless way to grab and annotate content in one fluid motion and is ideal for students, creatives, and multitaskers.

Keyboard Shortcut (For Magic/Bluetooth Keyboards)
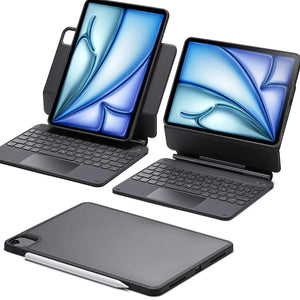
One of the simplest and easiest ways to take a screenshot on your iPad is by using a connected keyboard. By using a Magic or Bluetooth keyboard, you don't need to touch the screen at all. You can take screenshots by simply pressing a 1uick key combo, and the screenshot is done. If you don’t have such a keyboard to attach to your iPad, check out ESR’s magnetic keyboard case collection.
To learn how to screenshot on an iPad using this method, the following section will cover the shortcuts you can use for this purpose. This method is perfect for multitaskers, writers, or anyone who prefers keyboard controls over touch.

Shortcut 1. Command + Shift + 3, which takes a full-screen screenshot and saves it to your Photos app.
Shortcut 2. Command + Shift + 4, key combo lets you take a screenshot and open it in Markup Mode so you can instantly draw, highlight, or annotate before saving or sharing.
Conclusion
In conclusion, taking a screenshot at the right moment is essential, especially when you want to save something quickly. If your iPad screenshot is not working or you don’t know how to do it, this guide has covered all the methods for you.
Table for snippet bait:
Besides taking a screenshot, every iPad deserves the right protection to keep up with your daily use. Got it working? Grab ESR’s iPad cases and screen protectors that won't block Pencil/side buttons.
Frequently Asked Questions
Why can't I screenshot it on my iPad?
It could be due to an unresponsive button, incorrect button timings, or full storage issues. In some cases, restrictions like Screen Time settings can also block screenshots, but using Assistive Touch is a great workaround.
How to screenshot on an iPad without volume buttons?
To learn how to screenshot on an iPad without a home button or volume one, follow the given steps:
- Open your settings and choose “Accessibility,” then press the ‘Touch” option.
- Next, click the “Assistive Touch,” turn it on, then tap the floating button and pick the “Screenshot” button to capture the target screen.
Where are screenshots saved on an iPad?
They are automatically saved in the Photos app, and you can access them by opening the Photos app. Next, go to “Album” and in the “Screenshot” folder, there you can file all of them in one place.


